When I do Premiere Pro training for beginners, and even for experienced editors coming from Avid, FCP and other NLEs, I’m often struck by how inefficient their workflow is. Most beginners have a workflow that’s been developed by chance, not from careful thinking and a critical view on the efficiency.
Experienced editors coming from other NLEs tend to try to make Premiere Pro work like Avid or Final Cut Pro. And then experienced editors who’ve edited on Premiere Pro for a long time tend to use the latest version the same way they used Premiere before it even got Pro added to its name. Both methods are not ideal.
In this article, I’ll cover several techniques that will help you streamline your workflow in Premiere Pro CC and, ultimately, save you heaps of time in your future edits.
Content
1. Do more in the Bin
2. Use storyboard view to build a rough cut
3. Master Timeline Trimming
4. Use String-out Sequences and Pancake Timelines
1. Do more in the Bin
The bin is not just a folder or a container for your source clips. You can set in and out points, create storyboards, add effects, adjust audio levels, select audio channels etc. before you even throw the first clip in a timeline.
Scrub the thumbnails to set in and out points
In Icon View and Freeform View, every clip is in many ways a source monitor. You can hover scrub, use JKL for quick shuttling, or select a clip and drag the playhead (the slowest way) to find your preferred in and out points before you hit I and O.
Yes, you can set in and out points while hover scrubbing. Just drag the pointer over the clip in Icon view or Freeform View, and you’ll see a slim blue line with a gray playhead indicator.
Hover to scrub through your clip
Press I to set an in point and O to set an out point, just like you would in the source monitor. The blue line now shows the selected part of the clip.
Press I and O keys to set in and out points
If you don’t see that you’ve added an in or out point when you’re hover scrubbing you’ve probably had a clip selected, and you just added points to that clip instead. It’s a good idea to hit the keyboard shortcut for Deselect All before adding points during hover scrubbing. I’ve mapped this shortcut to F2, which is the same keyboard shortcut as Deselect All in After Effects.
-
To set a keyboard shortcut on a Mac, go to Premiere Pro > Keyboard Shortcuts
-
To set a keyboard shortcut on a Windows system, go to Edit > Keyboard Shortcuts
You can also select a clip in the bin and use JKL (JKL keys on your keyboard) shuttling to find your in and out points before hitting I and O. As usual, hitting L multiple times increases the speed in large steps, and hitting J multiple times decreases the speed until it starts playing backwards faster and faster. Press and hold K and hit J or L to move frame by frame. Press Shift+L to increase speed in smaller increments (10%) and Shift+J to decrease the speed in smaller increments.
Get rid of irrelevant audio channels
If your clips are dual mono, like when you’ve got the camera microphone on one track and a lavalier on the other track, you don’t really want both channels in the timeline.

Yes, you can choose audio channels even after the clips have been added to the timeline, but you’ll still have a stereo clip, just with the same audio in both channels. It’s much better to get rid of the unwanted channels before adding the clips to the timeline. Hit Shift+G and choose mono and one track.

As you can see above, I’ve saved a preset that makes this process quicker. You can save your own presets after making your choices by clicking the Save button just to the left of the Delete button.
After this procedure, the clips have only one audio channel when you add them to the timeline.

Even if you’ve recorded the same audio on both channels, which is often the case with DSLR footage, it’s a good idea to get rid of one of the channels so your clips become mono clips. This will make your waveforms twice as high, so it’s easier to read them, and some audio effects and presets work differently on stereo and mono clips. One example is the Normalize feature, where I will usually normalize to -3dB for stereo clips, and to 0 for mono clips.
It’s faster to normalize to 0 because you don’t have to enter a number—zero is the default—so mono clips are also faster to work with. You may wonder why you need to normalize mono and stereo clips to different levels? It’s because the mono clip will be 3dB lower when it’s panned to the center, so its peaks will automatically be at -3 when normalized to 0.
I also have an Audio preset in my preset pack (download for free: Jarle’s Presets 4.0) named Compressor 2.5:1, which works perfectly fine with mono clips, while it can make the audio too hot if you add it to stereo clips.
Save Adjustment Layers with effects on them
When you’re color grading you often have a situation where you need to add the same correction to multiple clips, and this is where Adjustment Layers come in very handy. But it takes a few clicks to create an adjustment layer, add an effect to it and tweak the settings. A lot of editors use effect presets to speed up the process a little, and that’s a great timesaver.
But with a little-known feature you can add the adjustment layer and the effect preset to all the clips in one go, and save even more time. I usually have a bin in my projects with Adjustment Layers that already have effect on them. Let’s try this.
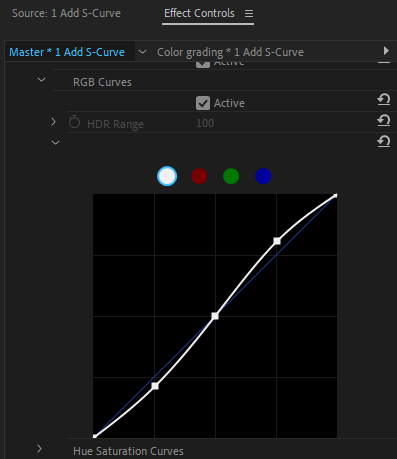
Begin by making an adjustment layer (File > New > Adjustment Layer), then drag an effect or an effect preset from the Effects panel to the adjustment layer in the bin. I’ll add the S-Curve Light preset from my preset pack. I’ve made a favorites folder in the Effects panel, so I don’t have to search for my most used effects and presets.
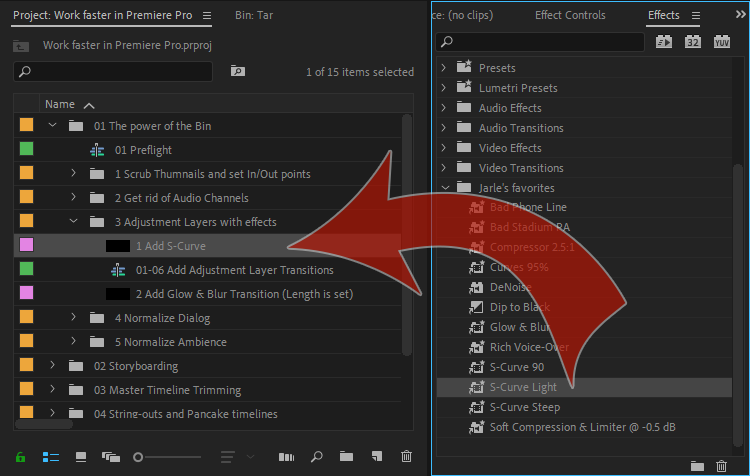
Now just drag the adjustment layer to the timeline above the clips you want the effect on, and you’re done. The effect is added to the adjustment layer as a Master Clip Effect, as you’ll see in the Effect Controls panel in you select the adjustment layer in the timeline. The adjustment layer has in effect become an “Effect Layer”.
You can save a collection of such effect layers in a bin, and you’ll have instant access to all your favorite effects.

Unfortunately, we can’t add presets with keyframed properties, like the Glow & Blur transition from my presets pack. Well, we can, but they will not work properly. You can still save some time if you make an adjustment layer with the correct length, so you don’t have to adjust the in and out points after putting it in the timeline. To do this, double-click the adjustment layer in the bin and set an out point.
Since my Glow & Blur transition has keyframes that span over ½ second, I made my adjustment layer ½ second long. To add my custom transition is now a two-step process: Add the adjustment layer above a cross dissolve transition in the timeline, and then drag the effect preset from your favorites folder in the Effects panel onto the adjustment layer. Here’s the result, achieved in less than two seconds when using the pre-made adjustment layer.

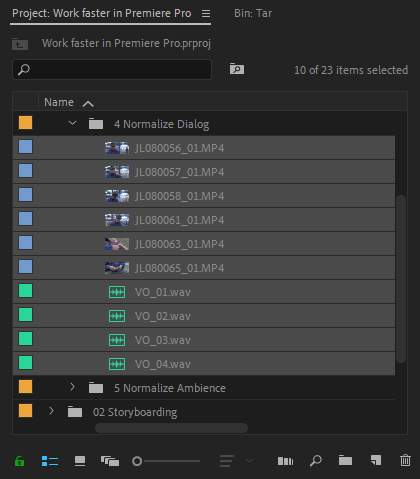
Normalize Dialog clips
Having worked as a sound engineer in the past, I hate listening to bad audio while editing, so I like to at least get the audio levels close to what they’ll be in the final mix before I even add them to the timeline.
Dialog clips are often recorded with varying audio levels, and I often see editors adjust the audio gain manually on individual clips. This is very time consuming, so I instead do a batch treatment of all my dialog clips to bring their levels in the ballpark with very little effort.
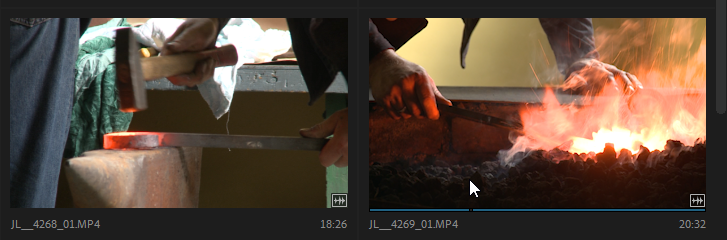
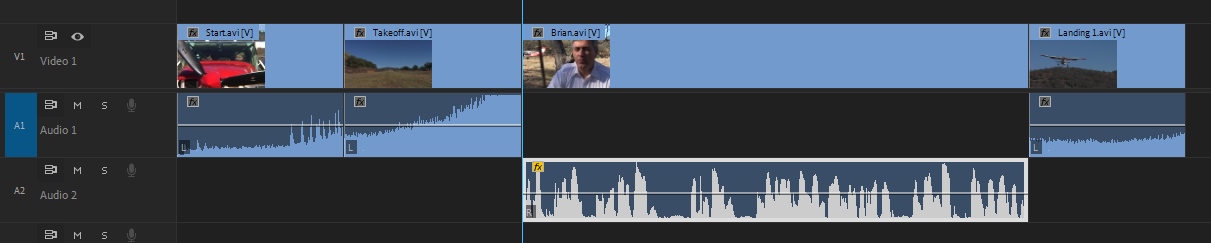
Start by selecting all the dialog clips in your bin. I have selected some interview clips and voice over clips in the figure below.
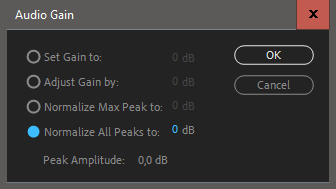
With the clips selected, hit G and choose Normalize All Peaks to. It should be set to 0 by default, which is what I want if this is for internet delivery, not broadcast.
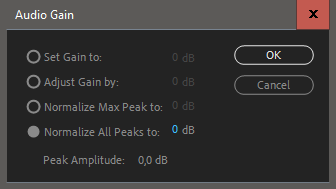
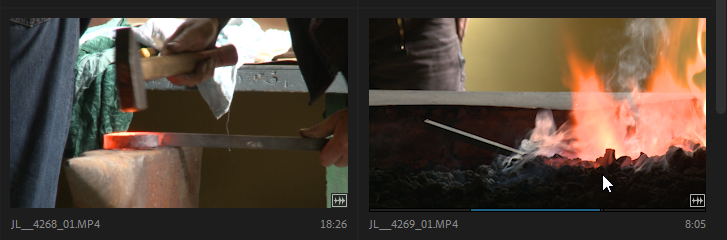
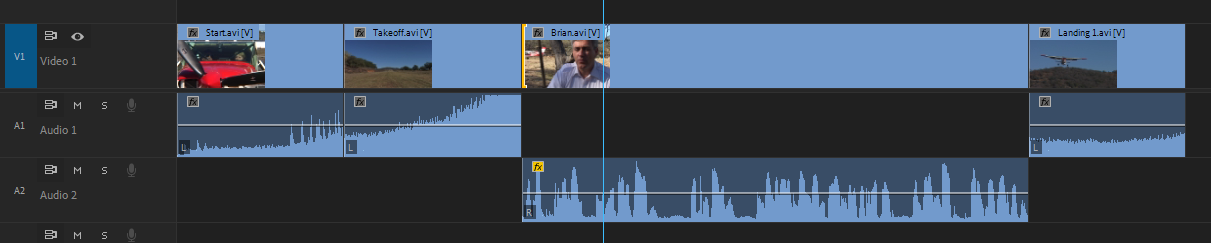
Premiere will analyze each clip individually and set the gain so that the highest peak in each clip reaches 0dB. This is great, because when you add them to the timeline, their audio levels will already be about right. Here’s the result after dragging the clips to a timeline. When I hit play, I can see that the audio levels never go above -3dB. That’s because they are mono clips, so they are 3dB lower when panned to the center. Perfect!

Normalized dialogue audio in a timeline
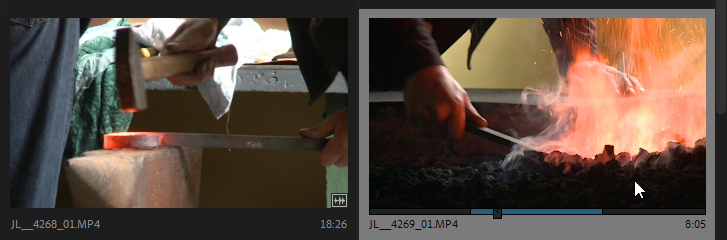
Note that the sound of the voice in the last clip does not seem to be right. The overall audio level is lower than for the rest of the clips. This is caused by the short peak that is way higher than the voice. So, this one clip must be treated individually in the timeline. You will find that clappers often produce peaks like this, so it’s a good idea to remove the clapper sound before setting the audio gain. Or you can do the same procedure in the timeline after doing the rough cut: Select the clips, hit G, choose Normalize All Peaks to and hit Enter.
“You will find that clappers often produce peaks...so it’s a good idea to remove the clapper sound, before setting the audio gain.
Even out uneven ambience levels
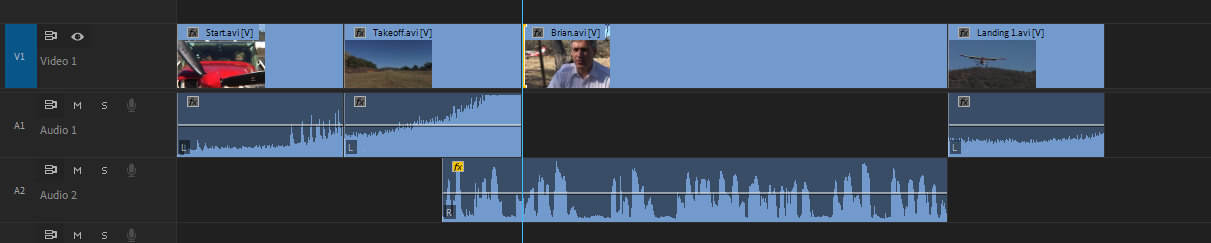
The levels of Ambience clips often vary even more than for dialog clips. I like to get them about right before I start editing. Here’s an example where the ambience varied as the camera was moved to shoot from different angles. This is how they looked when I just dragged the clips to the timeline without any prior adjustments:
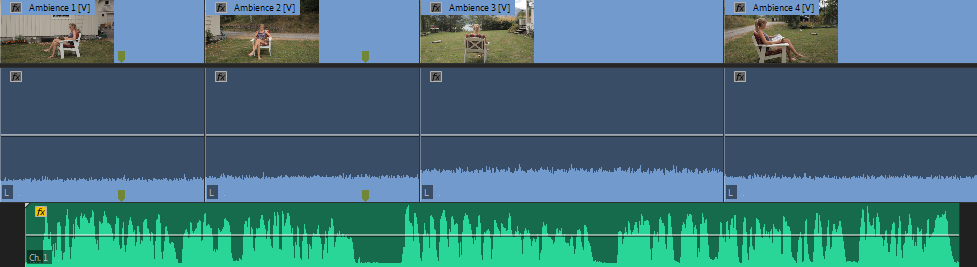
Blue audio tracks are “ambience.”
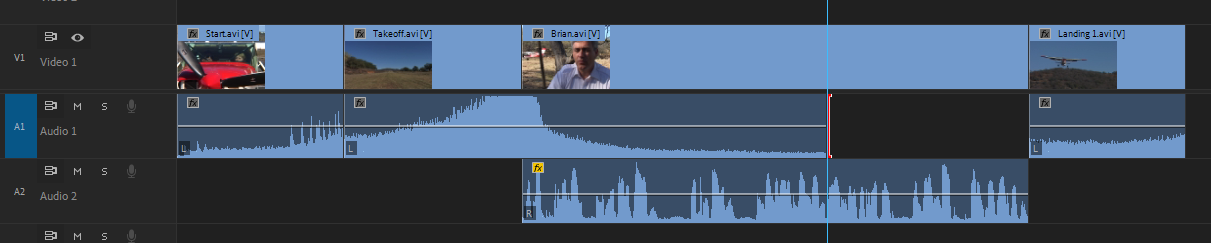
Since this was just some generic ambience, I wanted the level to be quite low. After hitting G I chose to set the Normalize All Peaks to level to -20dB.
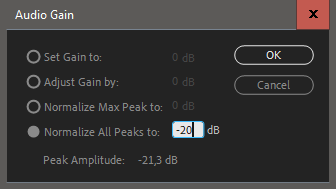
Here’s the result after dragging the clips to the timeline again. All the clips have the same audio level. I also added a default audio transition to all the cuts by hitting Shift+Ctrl+D (Shift+Cmd+D on macOS) after selecting the edit points. You can select edit points only, as opposed to selecting the clips, by pressing Ctrl (Cmd on macOS) while dragging a lasso around the clips.
You can now see that the ambience levels (blue audio track) are evenly at the same level.
Add compression to the Voice-Over
If you make effects presets for every voice-over artist on your team, you can add those presets to their VO clips in the bin, so they sound good immediately when you throw then in a timeline.
I often add my Compressor 2.5:1 preset to all voice-over clips if I don’t have a pre-made effect preset for that particular voice-over talent.
Yes, the Essential Sound panel has some of these features
Yes, I know I could use the Essential Sound panel's Loudness Auto-Match feature for some of these tasks—but there are a few reasons why I don’t. One is that I feel that this feature does a terrible job sometimes, especially with ambience, which will often come out way too loud.
I also don’t like the fact that we can only auto-match to one standard, which is broadcast. Most of my videos do not go to broadcasters, so I would need to auto-match to a different standard, which is more suitable for web delivery. Yes, it’s possible to hack Premiere Pro into doing that, but until we get the option to choose what standard and levels to auto-match to, I will not use the Essential Sound panel for loudness matching.
Then there’s the mess that using the Essential Sound Panel makes for some Audio post people by adding lots of audio effects to clips. When I only use Audio Gain and the Normalize feature, the audio post people will hear what I heard during editing. If the Audio post people could switch to Audition, this would not be an issue anymore, but for now, almost everyone seems to be using ProTools.
2. Use a storyboard view to build a rough cut
A standard workflow in video editing for decades has been to open a clip in the Source Monitor, set in and out points, and then add the clips to the timeline. Then you repeat this procedure for every clip you want in your story. While this works OK, it’s a very slow procedure.
As explained above, you can save one double-click (or a keyboard shortcut hit) per clip if you use the thumbnails in Icon View or Freeform View for viewing the source. Essentially, every clip has a built-in viewer where you can do almost everything you’re used to do in the Source Monitor.
Every thumbnail is scrubbable, plus you can use JKL shuttling, and set In and Out points. But Premiere Pro offers better ways of selecting what content goes into the timeline.
Use the Freeform View
The old and trusted Icon View has always been a good way to make a storyboard, but the new Freeform View takes this a huge step forward. You can organize, group, sort and shuffle the clips around, and even make some clips larger than others. It’s a very intuitive and satisfying way of building a story.
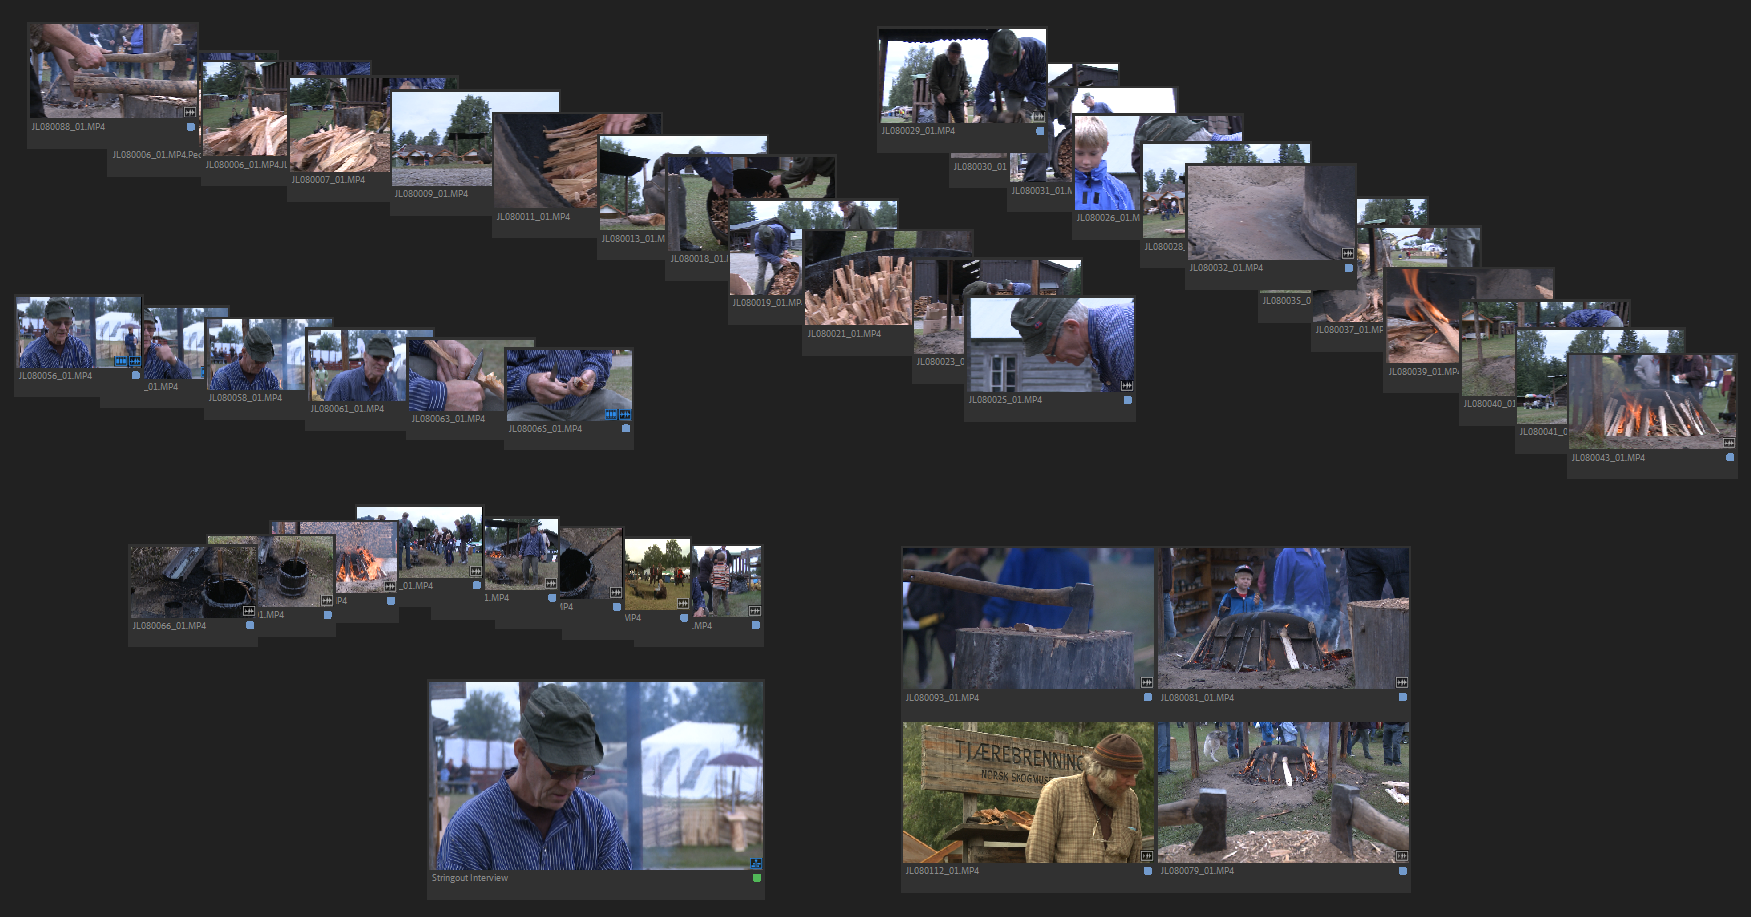
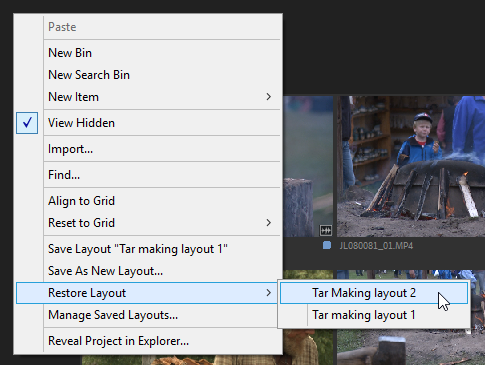
You can save your arrangements as different layouts, so it’s really easy to switch between different views of your footage. If you save your layouts you don’t need to worry about making a mess—order to chaos is just a few clicks away. Here’s the right-click menu in a bin.
Storyboarding
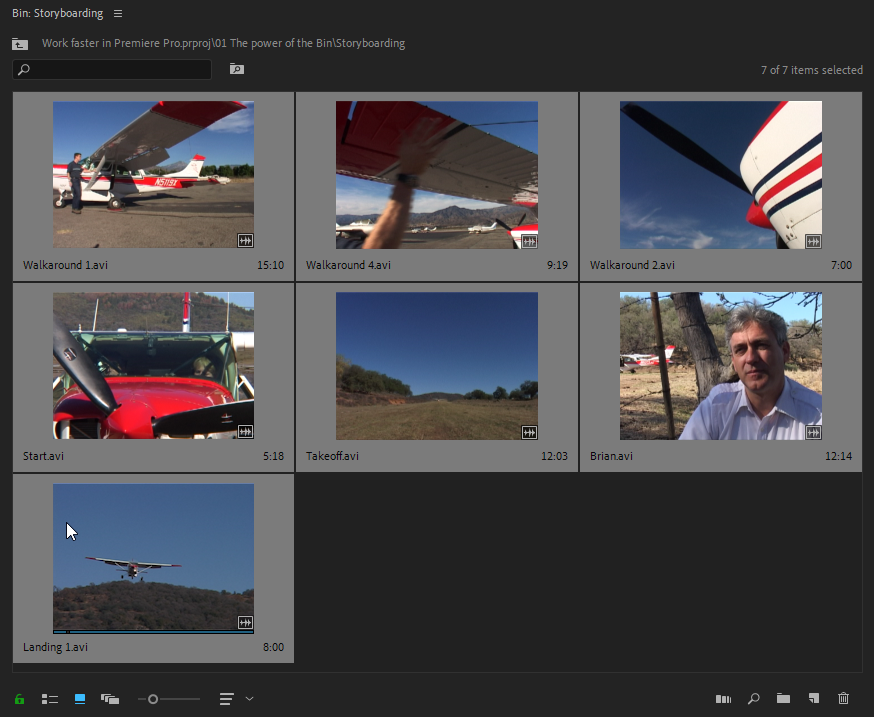
Even if you haven’t updated Premiere Pro for some reason, you can still use Storyboarding in Icon View. Here I have opened a bin as a floating panel, and by default, the clips are sorted in alphabetical order.
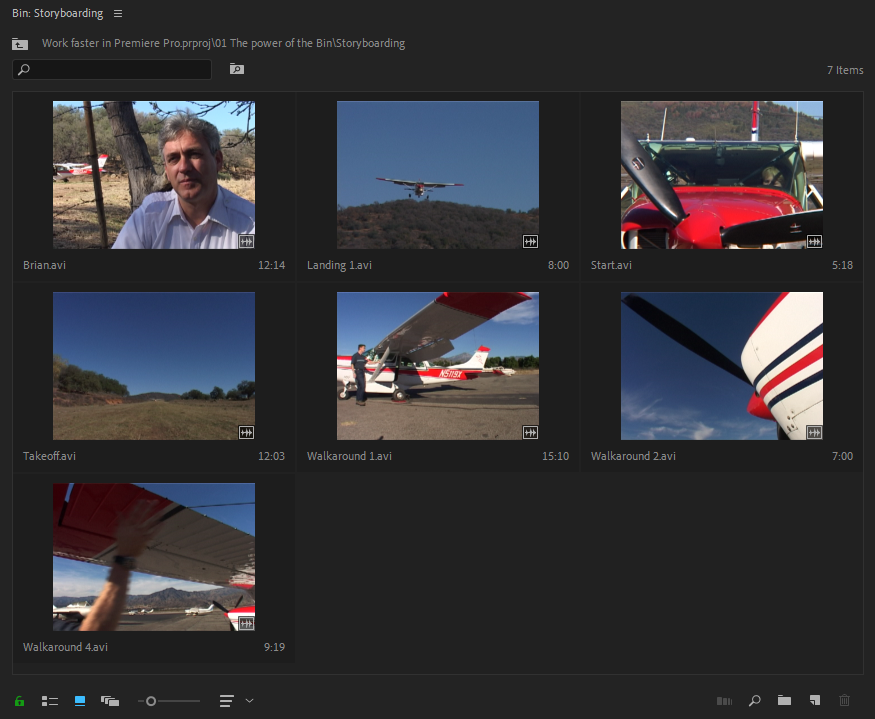
Storyboarding in the Project Panel - Default View
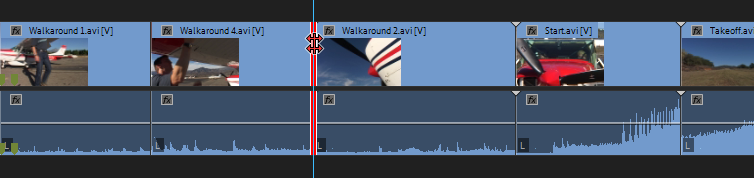
If the bin is set to show User Order in the Sort Icons menu (the three lines to the right of the slider in the bottom left corner of the bin) you can freely move the clips in any order you want. This is the standard sort order setting, so you probably don’t have to change it. Here’s the result of my re-ordering of clips.
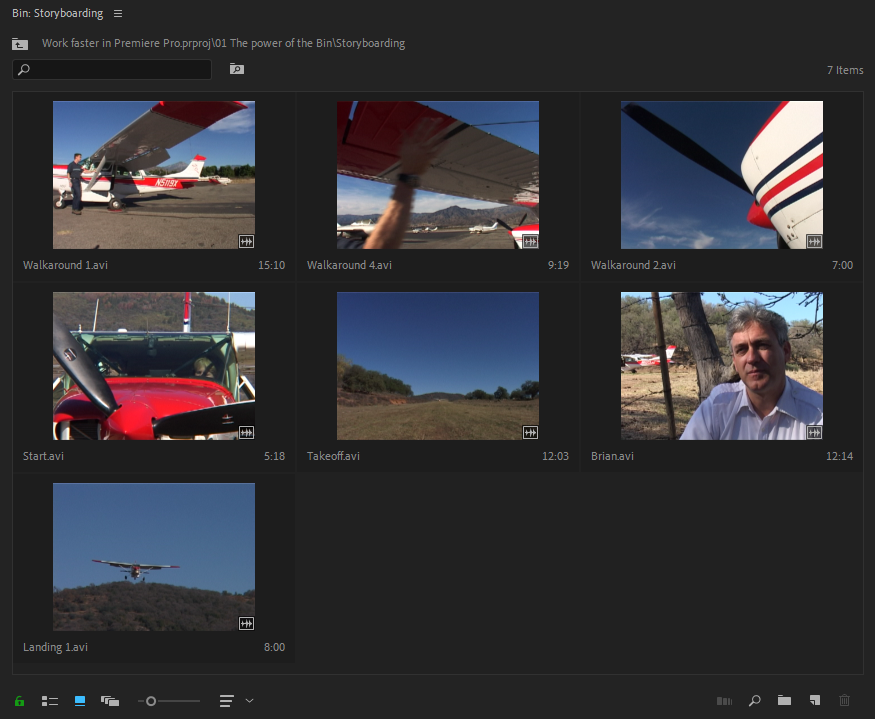
You can click and drag to reorder clips within a bin
This order makes a lot more sense. I start with a long shot showing the pilot and the airplane, then a close-up of flaps inspection, then propeller inspection. After the walk around, they can start the airplane, and do a take-off. Then we cut to an interview while the plane is in the air, and end the story with a landing.
When I throw these clips into the timeline, the story is already starting to take its form. To make sure that the clips end up in the correct order in the timeline, I click the first clip and then Shift-click on the last clips I want to include, before hitting the Period key to add the clips to the timeline.
Select the first clip, then Shift-click the last clip.
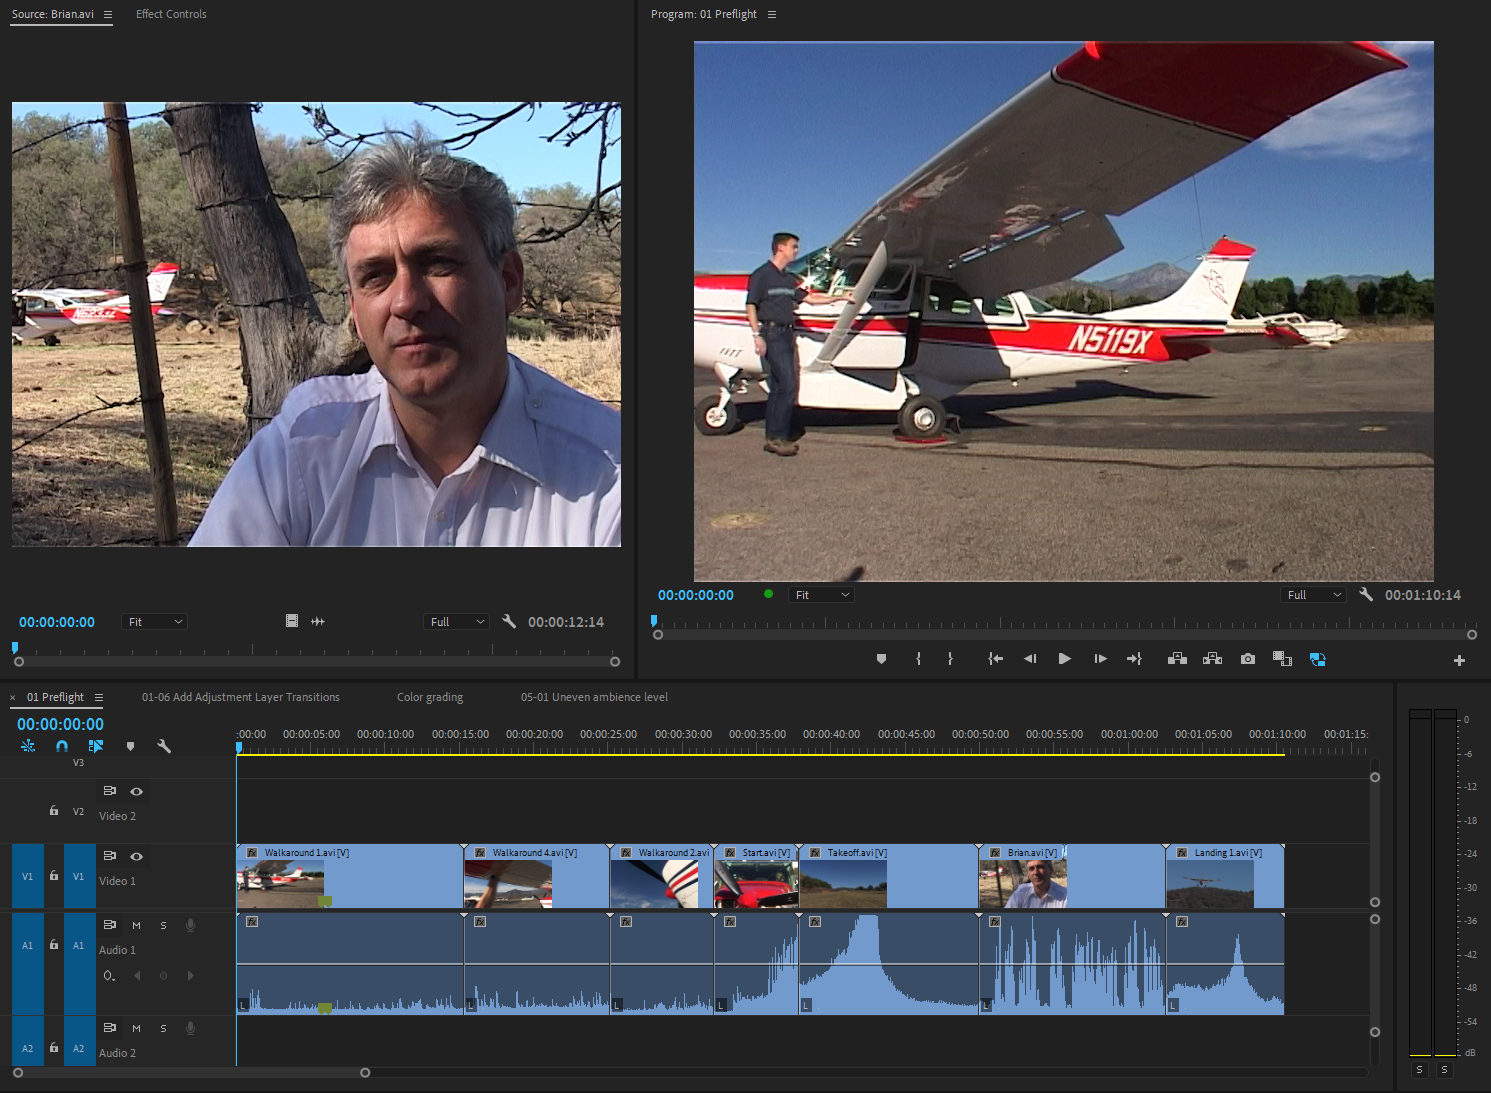
Press the “.” (period or full-stop key) to place all selected clips (in order) in your timeline.
Top & Tail editing with Q and W
Now we have the story outline, but we haven’t set any in and out points. After all, editing is mostly a process of deciding what goes into the movie, so we’ll trim off the top and tail using my two most favorite keyboard shortcuts in Premiere Pro: Q and W.
“All the extra fat is removed, and it was all done without the mouse.
Resting my right hand over the J, K, and L keys and the left hand over Q and W, I’m watching the Program monitor while playing fast or at normal speed. When I reach the point where I want to start the clip, I hit Q to ripple trim off the start of the clip which automatically closes the gap. Then I move the playhead (using J, K and L) to where I want the out point to be and hit W to trim off the rest of the clip. Rinse and repeat.
For most material, this is by far the fastest way to edit! You just can’t beat the speed of one single keyboard hit to trim off the top and one single keyboard hit to trim off the tail.
If you haven’t edited this way, then please give it a spin. It takes a little time to get used to it, but once you’ve mastered it, you’ll never go back. Here’s my timeline after top & tail editing. All the extra fat is removed, and it was all done without the mouse.

Top & Tail editing dialog and b-roll
I often hear people say that this technique seems very fast, but it won’t work with their material, because they edit b-roll to dialog clips. Well, I use the same technique for this kind of material, and it’s still super-fast.
Of course, you’ll sometimes have to split a clip in two so you can use different parts of it. I’ve mapped the Add Edit command to my R key, which is very close to Q and W. So when I need to split a clip I just hit R, and then trim the new part using Q and W.
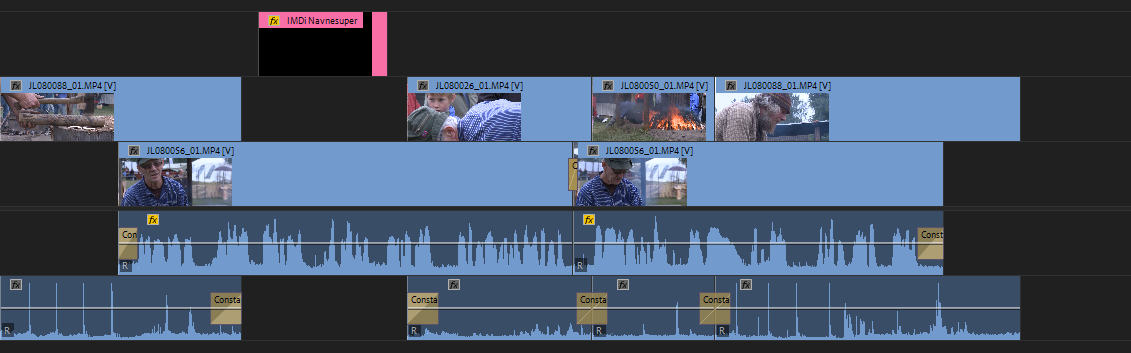
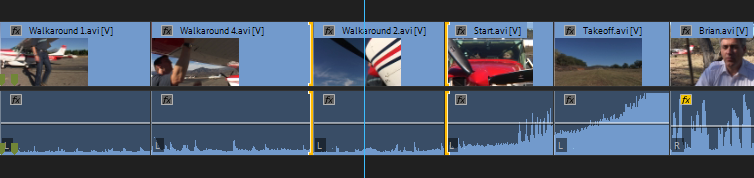
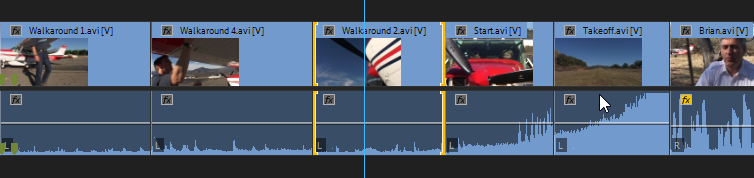
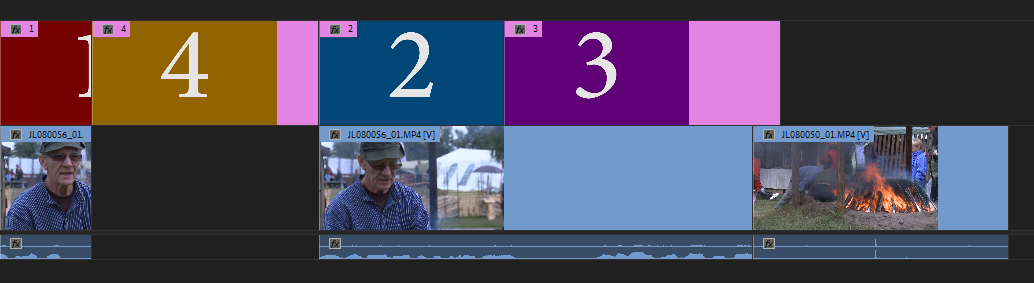
Here’s a short example with an interview and some b-roll. I’ve already Normalized the interview, storyboarded the whole thing, and added the clips to the timeline.

Here’s the timeline after my initial pass with Q, W, and R. Several minutes of material has been trimmed down to about 1 minute. Notice that the interview has been cut into three pieces with statements that I think I will use. One of the other clips has also been split.

Same edit as above, after an initial pass with Q,W, and R edits.
Now I move the b-roll clips to tracks V2 and A2, so I can freely move them around without interfering with the interview clips, and start building the story. For this part, the mouse is the most efficient tool. Here’s the finished edit, complete with a lower third. I chose not to use the third interview clip.
3. Master Timeline Trimming
Although they’re undoubtedly the most commonly used keys, Q and W, aka Ripple Trim previous/next edit to playhead, are just two of the trimming tools in Premiere Pro.
Trimming Principles
We’ll take a look at some other ways of trimming, but first we’ll have a look at the standard trimming principles used in every NLE.
Standard Trimming
This is what you get if you just drag the in or out points of a clip using the selection tool. Doing a standard trim leaves gaps in the timeline when you trim off a part of the clip. You can’t drag an edit point past another clip on the same track. Standard trim does not move the clip in the timeline, it stays in the same place. Premiere shows a red handle when you’re doing a standard trim.

Ripple Trimming
A ripple trim is what you do when you use Q and W, but you can also do it with your mouse, using the Ripple Edit tool. Press the B key on your key board, then drag an edit point with the standard selection tool. Ripple edits don’t leave gaps, and you can expand a clip past other clips on the same track—other clips will just be pushed away, making room for the extra material.
Ripple trims can change the duration of your entire film, and they will often move all clips behind the one you’re adjusting. Premiere shows a Yellow handle when you’re doing a standard trim.
Ripple trimming has a yellow line
Roll Edit
A roll edit affects two clips at once. It shifts the Out point of one clip and the In point of the other clip by the same amount, so the clips stay in place, and the duration of the film does not change. You can do a Roll edit by using the Rolling Edit tool by pressing the N key on your keyboard before clicking on an edit point. Premiere Pro shows a red icon with arrows pointing in both directions when you’re doing a Roll edit.
Roll edit has a red line
When you hit Shift+T to get into Trim mode, you’re doing a Roll edit by default. You can click the image on either side in the Trim Monitor to change from a Roll edit to a Ripple edit, but you can’t do a standard trim, leaving gaps, in Trim mode.
Slide Edit
A slide edit is the equivalent to moving a clip back and forth above two other clips, but it’s done on the same track. Here’s a figure that explains what’s going on. You’re basically moving one clip, without changing its in and out points sideways in the timeline, revealing different parts of the underlying clips.
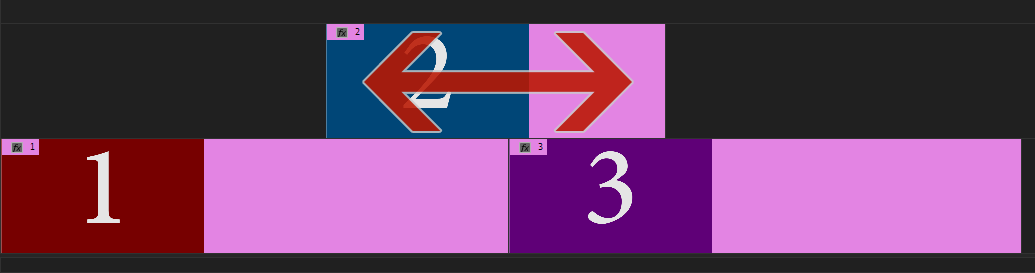
Slide edit principle
Most editors know how to do this by dragging the clip with the Slide tool (press the U key on your keyboard), but I find that method very inaccurate. I like to select the clips and nudge them frame accurately using the keyboard. Start by selecting the first edit point with the Ctrl-key (Cmd) pressed, then continue pressing that key while adding Shift before you click the other edit point.
It matters where you click, so move your pointer slightly to the left or right of the edit point until you’ve got the right selection. You know you’ve got it right if there’s a yellow bar pointing away from the clip on both sides.
Slide edit in action
Now press Ctrl (Cmd) while tapping the Left or Right Arrow keys to move the clip frame by frame. Add Shift if you want to move it in larger steps.
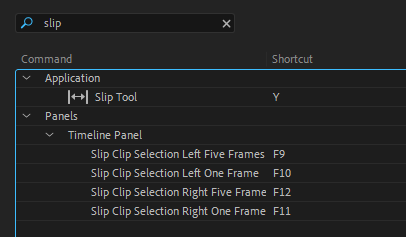
Slip Edit
A slip edit is the equivalent to moving a clip back and forth below two other clips with a gap between them. A Slip edit does not affect the neighboring clips at all, it just reveals a different part of the clip you’re moving. See this figure to understand what’s going on. Like the Slide edit, it’s all done on one track, though.

Slip edit principle
Many editors use the Slip Tool (press the Y key on your keyboard) for this kind of edit, but again, I find it less accurate than using the keyboard. If you want a visual indication of what’s going on, you can Ctrl-click (Cmd-click) the edit points like we did with the Slide edit, but this time, the bars should be pointing towards the clip. Then nudge the clip by pressing Ctrl (Cmd) and tapping the arrow keys.
You don’t actually have to select the edit points to do this. You can also select the clip and press Alt+Ctrl while tapping the arrow keys, which will do exactly the same, but without the visual indication.
I recommend changing the default keyboard shortcuts for slipping if you use this technique often.
Swap Edit
A swap edit is used when you need two clips on the same track to change places without affecting clips on other tracks. For some reason, a lot of editors don’t know that this kind of edit even exists. In Premiere Pro, you can do a swap edit by pressing both the Alt (Option) key and the Ctrl (Cmd) key while dragging a clip to its new destination.


The clips have been swapped by a simple drag-n-drop. Notice the strange looking cursor you get when the clip is over another one on the same track. It changes depending on if you drag the clip to the left or to the right.

Swap cursor left

Swap cursor right
At first glance it may be hard to spot the difference between pressing just the Ctrl (Cmd) key and pressing both the Alt (Option) key and the Ctrl (Cmd) key while dragging a clip. If you’ve got only one track of video and audio, the result is exactly the same.
But if you’ve got some clips on other tracks, you will immediately see the difference: Pressing both keys makes Premiere leave the other tracks untouched. If you don’t add Alt (Option), you’re doing an Insert edit, which Premiere Pro tries to tell you by showing a different cursor.

Insert Edit
You will certainly see the difference if you do it wrong as the result is very different. By using the Insert clip, I messed up the interview clip, splitting it in two, and moved all the later clips to the right. A Swap edit is definitely much better in this case.
Results of a Insert Edit, not a swap edit.
Making an Audio Split without the mouse
It’s entirely possible to do timeline trimming without using a mouse or other pointing device. A quick search for “edit point” in the Keyboard Shortcuts editor reveals quite a few mappable keyboard shortcuts. I’ve mapped a few.
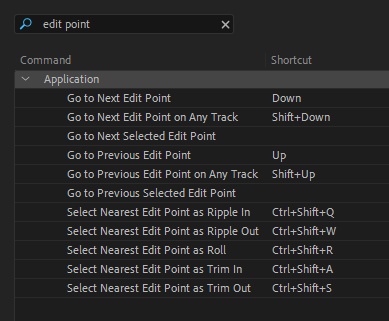
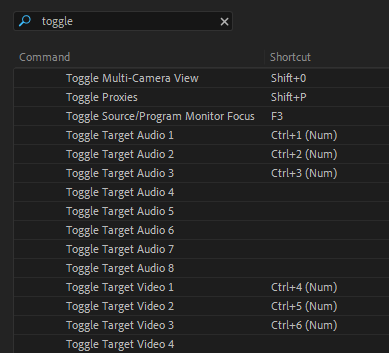
In addition to selecting points, you also need to select what tracks to work with, so I’ve also mapped a few keyboard shortcuts for toggling target tracks, both audio and video.
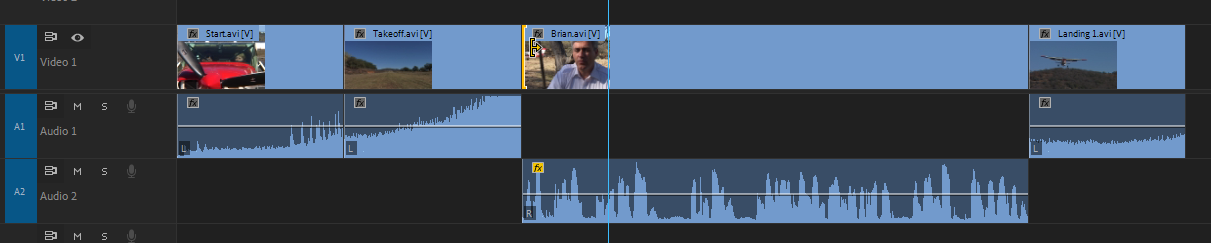
Here’s the situation: We want to do an audio split on the interview clip that starts where the playhead is parked. We want the audio to start before the video. To do this with the keyboard, we need to do several operations:
1. Select the audio part of the clip
2. Move it to audio track 2
3. Select the video in point
4. Move the video in point to about 1.5 to 2 seconds into the interview clip
5. Close the gap

There are a few ways to do this, but I would start by hitting Ctrl+4 to un-target V1 (my custom shortcut). Then I would hit D to select the clip under the playhead. Since V1 was un-targeted, this selects the audio clip only. Then I’d hit Alt+Down Arrow to move the audio clip to A2. Here’s the situation right now.
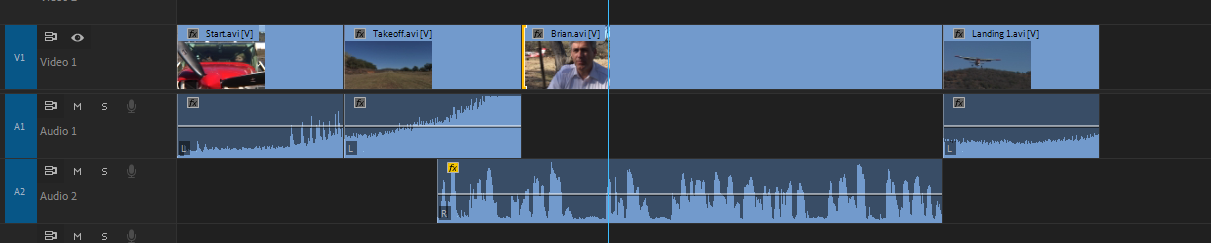
Next, we need to select the video part of the clip as Ripple Trim in, but to do that, we must un-target the audio track and target the video track. I do this by pressing Ctrl and hitting 4, then 1 (my custom shortcuts again).
My custom shortcut for Select Nearest Edit Point as Ripple Trim In is Shift+Ctrl+Q, so that’s my next step. Then I hit Play and then Stop after about 1.5 seconds. This results in the following situation.
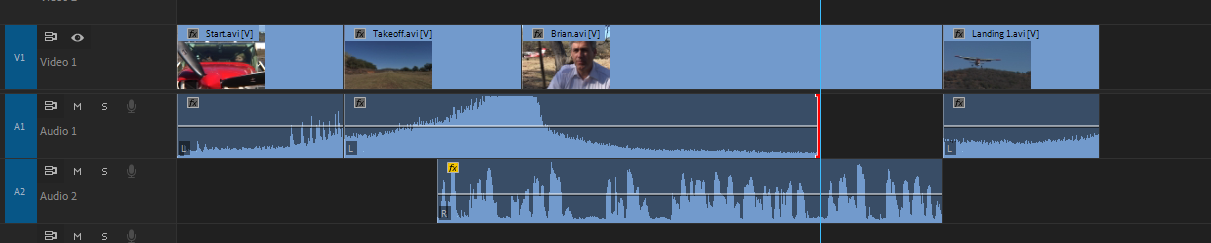
It’s tempting to hit Q now to trim off the start, but that will trim the audio too. Instead we’ll hit E to do an Extend Edit. This moves the edit point to where the playhead is parked, and since it’s selected as Ripple Trim in, it closes the gap automatically. Nice!
If I wanted to extend the audio part of the clip before the interview, I would deselect the edit point (I’ve mapped Deselect All to F2, the same as in After Effects), then make sure only A1 is targeted (using my custom shortcuts) before hitting Select Nearest Edit Point as Trim In. After this it’s just a matter of hitting Play and wait until I reach the point where I think the out point should be, and then hit E again to move the selected edit point.
“OK, so we know it’s possible to do most edits using the keyboard only. But is it the most effective way? Nope. Most of the time, it’s the combination of the mouse and the keyboard that gets the job done the quickest way.
Extend Edit
As you’ve probably guessed, Extend Edit is one of my absolute favorite trimming features. The keyboard shortcut is E, and it moves the selected edit point to where the playhead is parked, no matter what kind of edit it is. The workflow is very straight forward: Select the edit point, place the playhead where you want it to move, and hit E.
Combine the mouse and the keyboard for even faster editing
OK, so we know it’s possible to do most edits using the keyboard only. But is it the most effective way? Nope. Most of the time, it’s the combination of the mouse and the keyboard that gets the job done the quickest way.
In the case of the audio splits above, it would be much quicker to select the edit points with the mouse than to target and un-target tracks, select edit points, move the playhead etc. using the keyboard only. The first split could be done by just Ctrl+Alt-dragging (Option+Cmd-dragging) the Video in point of the interview clip.
Much faster! The second split could be done by Alt-selecting (Option-selecting) the Audio Out point of the clip before the interview and hitting E after parking the playhead.
Again, the combination of mouse and keyboard is way faster than any of them alone. Don’t be a keyboard extremist. Use whatever tool gets the job done faster!
4. Pancake style editing—use your sequences as the source
Another way to skip the traditional open-each-clip-in-the-source-monitor method is to use the Source Monitor as a viewer for your string-out sequences, not for single clips. This way, you can watch your select sequences in the source monitor with a dedicated timeline, while still seeing your edit sequence in the Program Monitor with its dedicated timeline.
You build your string-out sequences the same way you’d do any rough cut: You use Q and W and Add Edit (I’ve mapped it to R) to trim off the fat. I don’t like working in long timelines, so I split my projects into many short string-outs. I have one for each interviewee and one for each situation related sequence.
Build your string-out sequences
Now let’s give ourselves quick access to these string-out sequences. I map a keyboard shortcut to Open in Timeline (from the source monitor): Shift+O. This is the same shortcut as for Open in Source Monitor (from the bin). So to open a sequence in the source Monitor with its own timeline, I just select the sequence and press Shift, then I hit O twice.
We want the string-outs to be in a separate panel than the main edit sequence, so we drag it a little bit downwards until we see the blue overlay.

When we let go, this places the string-out sequence above the main sequence. I keep selecting sequences in the project panel and hitting Shift+O until I have all my string-outs open.
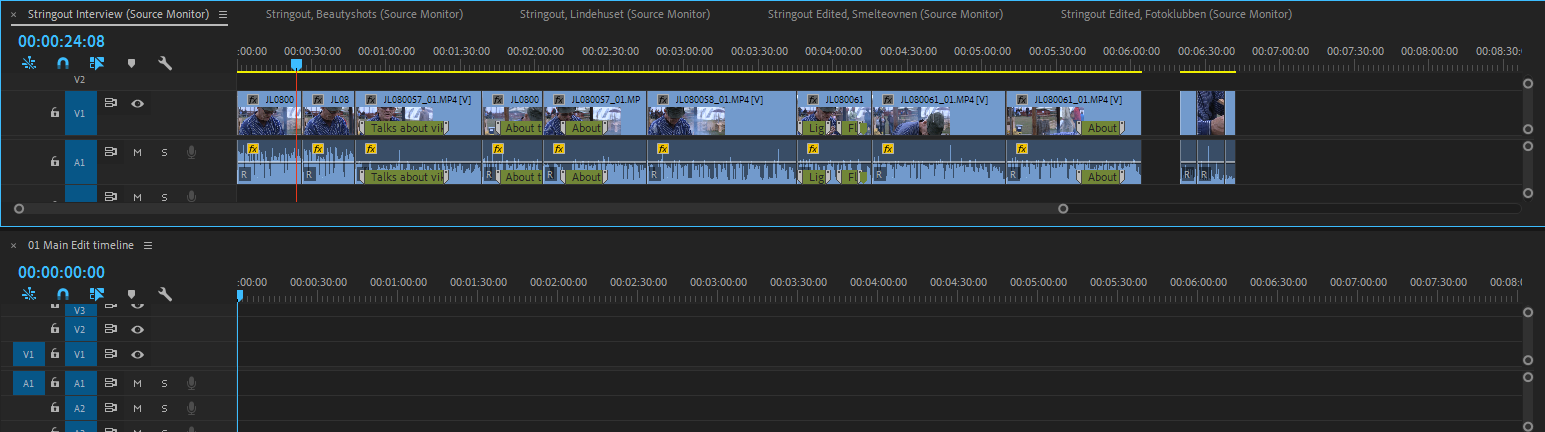
This puts us in a fantastic position! We have the Program monitor that shows the main edit timeline, and the Source monitor follows whatever string-out sequence is showing. This is super-flexible and gives you quick access to all your carefully selected clips.
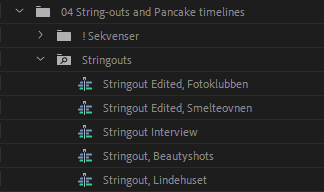
My string-outs aren’t all alike. Some are just collections of clips, some are rough cut sequences, and some are even carefully tweaked and finely tuned.
Here’s a small collection of my own string-outs.


Use your string-out sequences as your sources
Now, there are several ways to grab material from the sting-outs to the main editing timeline. The most obvious one is to drag and drop clips from one timeline to the other. But you’re not restricted to whole clips. You can also set In and Out points in the string-outs using I and O as usual, and hit Full stop or Comma to do overwrite and insert edits.
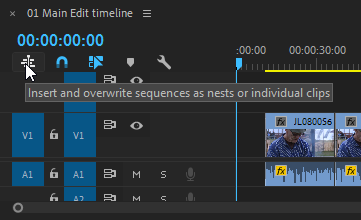
If you don’t want to get nested sequences, and you probably don’t, make sure that the “Nest-or-Not” button is white, not blue, before you use the keyboard shortcuts to add stuff to the main edit timeline.
Source Channel mapping (the V and A buttons to the left of the padlocks in the timeline) work just as with other sources, so clicking on track 2 for audio and video made sure that the material between In and Out points in the string-out below ended up on tracks V2 and A2.
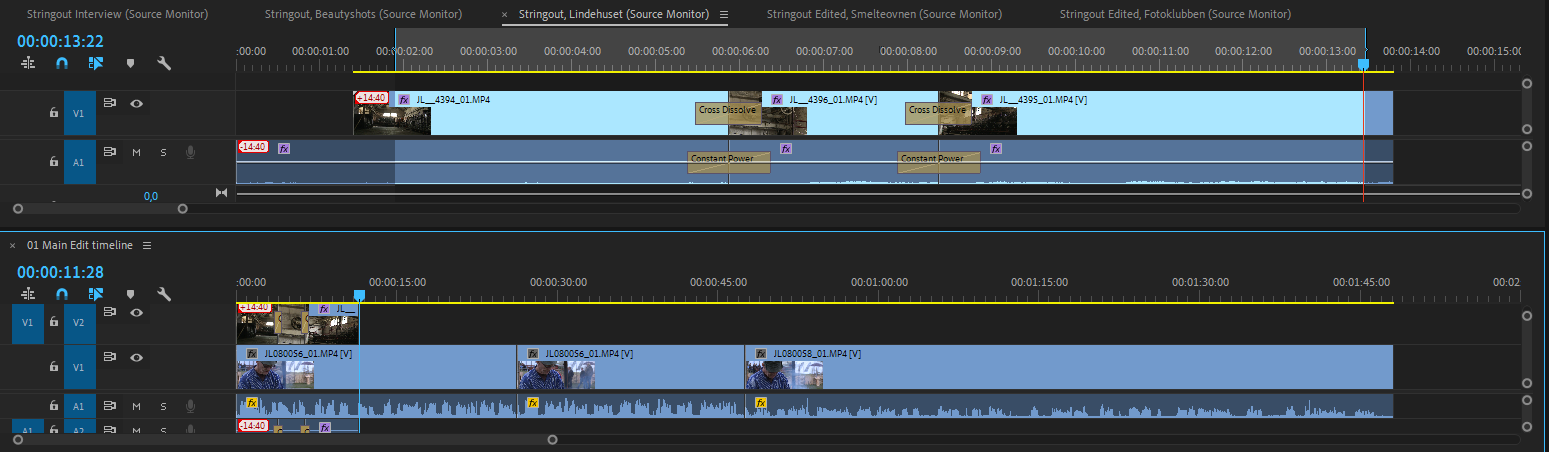
For adding clips from more complex sequences you’ll have to enable more source tracks, so you need to see all the tracks in your main edit timeline. The keyboard shortcut of Maximize Frame under Cursor comes in super handy for this.
My brain can’t keep track of hundreds of clips in a long timeline, but I can easily grasp what’s going on in a 30 or 50-second timeline. Even if you don’t want to edit Pancake style for some obscure reason, you can still benefit from editing in shorter sequences before adding the content to your timeline. You can edit in short timelines, and copy or drag the edited piece over to the main timeline.

You can keep adding material from all the string-outs sequences using all the editing techniques you know, and build your story faster than you ever thought was possible. It’s so much faster to find a clip in a timeline with a ganged monitor than to find it in a bin.
Outro
I hope you find these tips useful, and that this article has inspired you to re-think how you edit in Premiere Pro. You don’t have to edit exactly like me, but you shouldn’t edit in one particular way just because you’ve always done it that way, or because you used to edit that way in another software. These days, with increasingly tighter deadlines, your chosen technique should be the one that gets the job done faster than any other technique.
If you haven’t started editing Pancake style, I urge you to give it a try on your next project. It’s such a quantum leap in efficiency that if you were my employee and didn’t use it, I might try to get you fired for wasting my company’s time! OK, maybe not if I really liked you as a person.
Jarle Leirpoll is a Certified Master Instructor Trainer for Adobe Premiere Pro and he runs the PremierePro.net website. He is also the author of “The Cool Stuff in Premiere Pro: Learn Advanced Editing Techniques to Dramatically Speed Up Your Workflow.”